 Membrane carportsClassic membrane shelters→
 Solar carportsParking meets green energy→
 Landscape canopiesParks and leisure spaces→
 Grandstand canopiesSports venue shelters→
 Inflatable play cloudsFamily play areas→
 Wastewater coversEnvironmental infrastructure→
 Fuel station canopiesStation shelters→
 Entrance canopiesWalkways and entrances→
Membrane Carport Dripping After Rain: How to Record the Leak Location and Tell Membrane Surface, Seam, and Drainage Interface Leaks Apart
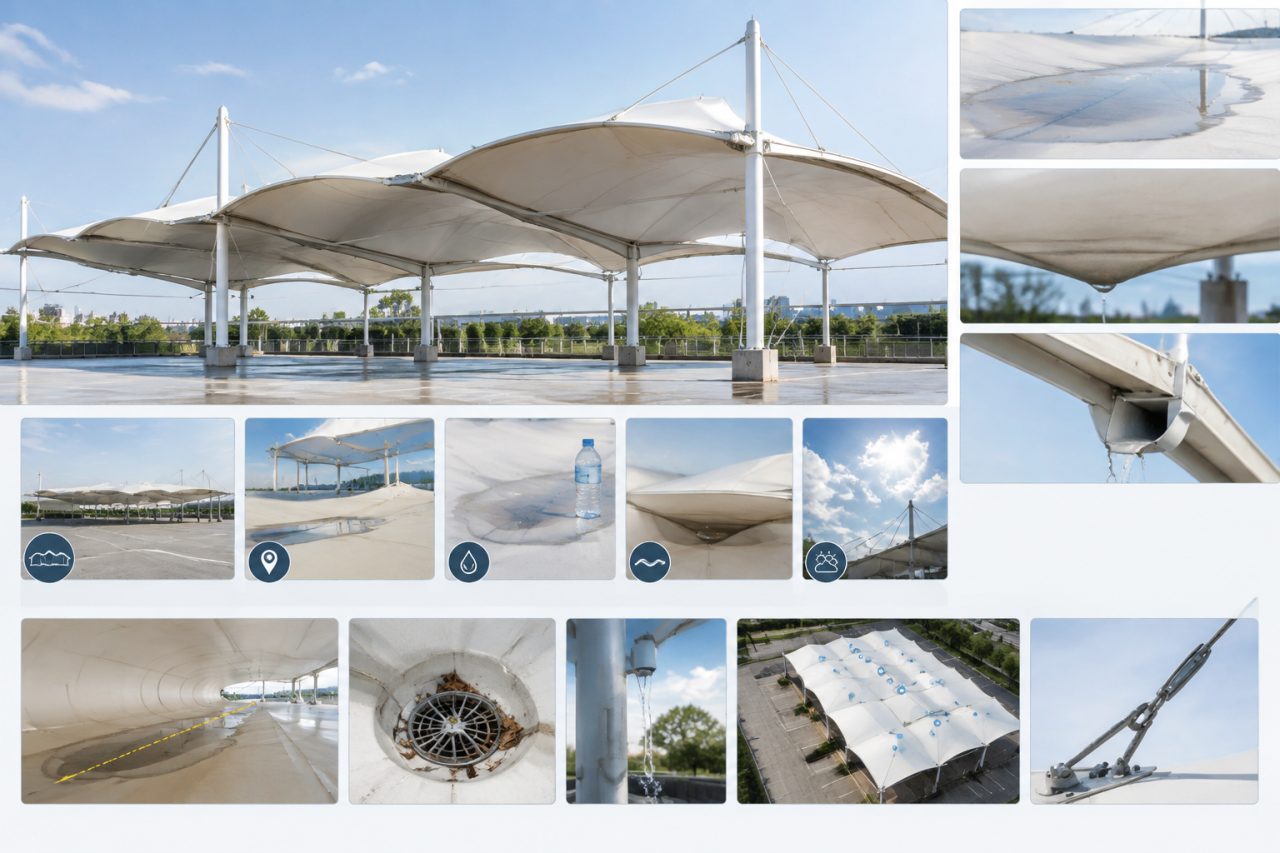
When you find a membrane canopy for car parking dripping after rain, the first step is not climbing up to look for the cause. While the water traces are still fresh, photograph, locate and mark the leak points. Once the traces dry, diagnosis becomes noticeably harder, so the usable window after rainfall is short.
Step 1: What to Record When Dripping Appears
First-hand site records should include the following:
- Position: where exactly the drip point is under the canopy — for example, which bay it is in and which column it is near. Where possible, measure the distance to the adjacent column with a tape measure.
- Photos: one wide shot of the drip point (showing a reference object) plus close-ups, numbered in sequence and matched one-to-one with your written notes.
- Weather: rain intensity, whether the rain was continuous, and wind direction. Dripping in light rain but not heavy rain, or only from one wind direction, is valuable diagnostic information.
- Timing: whether dripping occurs during rain, right after rain stops, or hours later.
- Water trace pattern: whether there is spreading damp on the underside of the membrane, a continuous water line along a seam, or a concentrated stream at an interface.
Mark each leak point directly below on the site with an erasable marker or sticker, numbered to match the photos, so a later reviewer can find each point quickly.
How to Tell Membrane Surface Leakage from Seam Leakage
The two produce different water trace patterns:
| Indicator | Membrane surface leak | Seam leak |
|---|---|---|
| Trace distribution | A single local spot on the membrane with irregular edges | A line or string-of-beads pattern along the seam |
| Underside damp marks | Spread outward from the leak point | Follow the weld or stitching line |
| Drip pattern | Steady dripping during rain at a fixed position | Often continues briefly after rain stops |
| Repeatability | Same spot every time it rains | Multiple positions along the seam appear in turn |
In short: a fixed single point suggests membrane surface damage or a pinhole; a line following a seam suggests a seam issue. If you cannot tell, do not force a conclusion — record the photos and marked positions accurately and leave the diagnosis to a professional reviewer.
How to Identify Leakage at Drainage Interfaces
Drainage interfaces are the junctions between the membrane and gutters, outlets, eave trims and similar details. Typical signs include:
- Dripping concentrated directly below an interface or near trim panels, not in the middle field of the membrane;
- Heavy dripping in heavy rain but little or none in light rain — often the opposite of membrane surface leakage;
- Signs of ponding or backflow near the interface, aged or cracked sealant, or debris build-up.
Note: dripping at an interface does not necessarily mean the interface itself has failed — poor drainage can cause water to pond and overflow the trim. When recording, also photograph the drainage condition of that area (any blockage, depth of standing water).
Leak Record Template
You can use this format directly:
- Project / canopy number:
- Leak point number and position description:
- Date found and weather (rain intensity, wind direction):
- Drip timing (during rain / after rain):
- Photo numbers: at least one wide shot plus two close-ups
- Initial pattern: point / line / concentrated at an interface
- On-site marking: marked / not reachable
Who Should Review the Records
For projects still under warranty, contact the original contractor for repair under the terms of the contract. Design responsibility, supply scope and warranty boundaries for a tensile membrane structure should be agreed with the buyer and their project engineer, and confirmed against the contract documents and material documentation. If you did not purchase the canopy from us, the same records can be handed to any qualified local inspector or installer for review.
Cases You Should Not Handle Yourself
Contact professionals directly — do not climb or attempt repairs yourself — in these situations:
- The leak point can only be reached by walking on the membrane or working at height. Membrane surfaces must not be walked on casually; without knowing the structure's load state, access is risky.
- Dripping is accompanied by visible membrane deformation, increasing slack, or signs of loose cable hardware.
- Seams are leaking over a large area or along a full line. This involves re-welding or restitching, which is factory work; on-site tape is only a temporary measure.
- The case involves drainage system modification or component replacement, which needs to be reviewed against the project conditions before a plan is set.
On site, limit yourself to photographing, marking and temporarily catching drips (for example, with a bucket). Repairs and replacements should be carried out by a qualified installation team.
Helping Reviewers Locate the Points
For carports with scattered leak points or areas that are hard to inspect on foot, the reviewing team may use suitable access or survey methods to check ponding paths on the membrane and the overall condition of seams, reducing unnecessary climbing. Agree in advance who performs the inspection, what access methods are acceptable, and how findings will be documented.
If you would like to discuss a leak review or repair arrangement, please prepare: the intended use of the canopy, its dimensions or available drawings, your leak record list and photos, and the scope of service you wish to commission (inspection only, repair, or including a drainage system check). Share these details with us so we can review the scope together.